Whether you’re performing engineering simulations, rendering CG scenes, or you just want a beat all gaming rig, there are times where your average desktop computer just doesn’t cut. For these times there’s the workstation. With similarly specced systems from HP and Dell costing upwards of $6000, we decided to build our own, and Project Colossus was born.
Project Colossus
To meet our needs, The Colossus had to be a versatile powerhouse that could multitask like no other with an emphasis on CPU rendering, all within my budget. I decided to go with a dual-socket Intel e5500 platform, keeping the cost to performance ratio in mind to avoid diminishing returns. Data redundancy was a must and extra scavenged hard drives are used to help keep costs down. After putting a plan together, it was time to do some shopping.
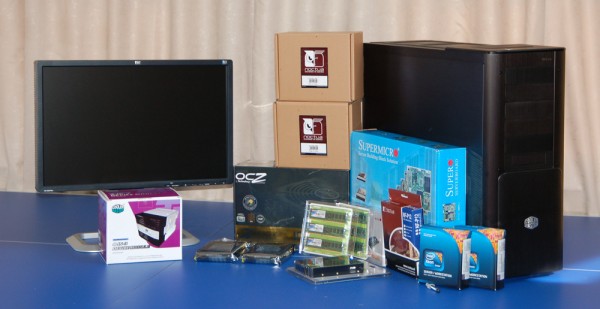
The Hardware:
- Case: Cooler Master ATCS 840 ($199.99)
- Motherboard: Supermicro X8DA3 ($449.99)
- CPU: (2x) Intel e5520 80w ($384.99 each)
- RAM: (2x) 3x2GB Wintec Industries ECC Registered DDR3-1333 ($199.99 each)
- CPU Heatsink: (2x) Noctua NH-U12DX ($69.99 each)
- Video Card: XFX ATI HD5870 ($379.99)
- PSU: OCZ Z Series Gold 1000W modular ($299.99)
- Optical Drive: Sony Optiarc 24x ($32.99)
- SSD + HDD:
- -Intel x25-m G2 160GB ($479.40)
- -Western Digital 1TB Black Caviar ($99.99)
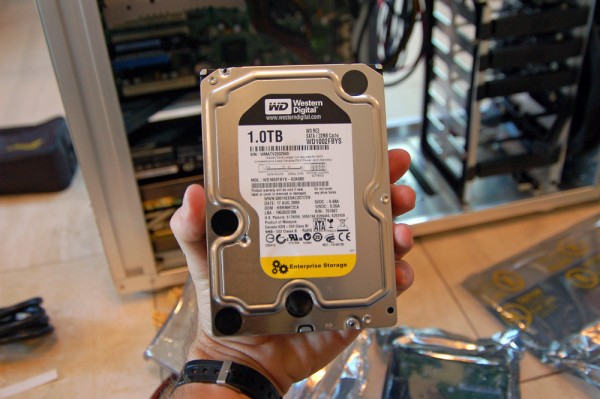
- -Western Digital 1TB RE3 Enterprise (2x) ($159.99 each)
- -Western Digital 320GB Black Caviar (2x) ($64.99 each)
- -Western Digital 500GB ($69.99)
- Miscelaneous:
- Rosewill PCI RAID Controller ($19.99)
- ICY DOCK 2.5″ to 3.5″ Drive Adapter ($24.99)
Total Cost: $3,835.21
Drive Configuration
To get the most out of our hardware and prevent a performance bottleneck, our operating system main drive will use a solid state drive (SSD). Unlike mechanical hard disk drives (HDD) that use physical platters, SSDs use flash-memory based storage that gives them much faster read and write speeds and incredible random access times, albeit at a premium price–$3.00/GB compared to around $0.10/GB for HDDs. We’re using a 160 GB Intel x25-m G2, the latest iteration of Intel’s MLC flash memory SSDs.
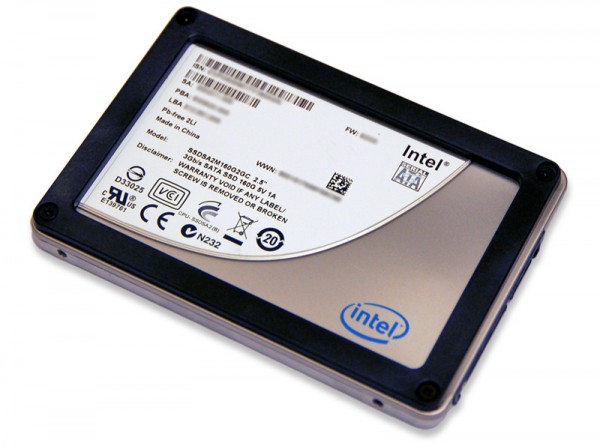
The latest firmware update for x25-m G2 drives enables TRIM support in Windows 7, hopefully without bricking the drive, as the first firmware update did with an unfortunate few. Along with TRIM support for Windows 7, Intel has provided a toolbox suite to execute a manual TRIM operation in XP and Vistato retain optimal drive performance. This will, for the most part, help the drive avoid the inherent performance degradation in all SSDs that occurs over time.
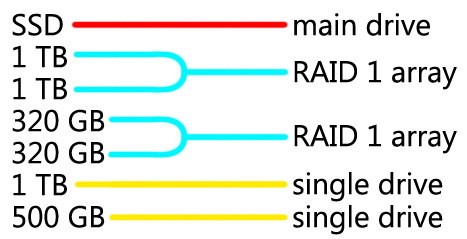
Whenever data has significant value, it’s wise to back it up. We’re going to do just that on the fly with data redundancy using two RAID 1 arrays, where the data on each drive is mirrored to another in case of drive failure. Using three 1 TB HDDs in RAID 5 was considered, but the cost of an extra drive and more substantially, the cost of a decent RAID 5 controller made RAID 1 our best option. Our two arrays consisted of a 320GB array, used for personal documents, and a 1TB array using Western Digital RE3 enterprise grade drives, that will store project files accessed by editing, modeling and rendering software. I also wanted plenty of space to store non-vital data, such as movies and music. For that I used a lone 1 TB and 500 GB drives.
This configuration already presented a problem simply because many of the dual-socket Intel 5500 motherboards only have six SATA ports and once we add a SATA optical drive, it will need eight. To solve this, I used an inexpensive 1.5 GB/s PCI RAID controller with two SATA ports and one IDE port that will also give us backwards compatibility with older drives. Despite its limitations, it’s just what we need for storage drives that won’t require high-speed transfer or complex RAID setups.
Building The Colossus
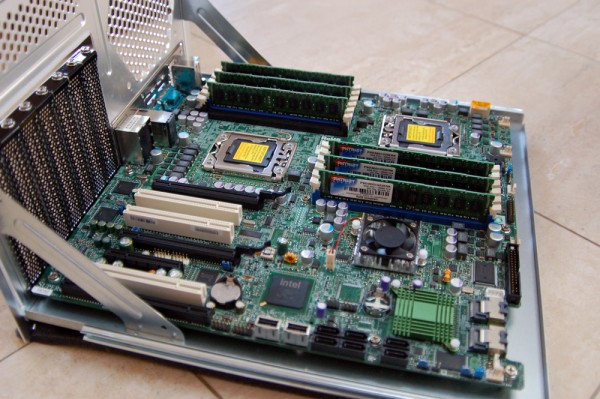
The Supermicro X8DA3 is a large eATX board, sized to accommodate two e5500 series Xeon processors and up to 96GB of ECC Registered memory, you read that right, ninety-six gigabytes. Supermicro had a particularly small list of tested compatible memory for the X8DA3, so we made our best guess with what was easily available. 12GB of Patriot ECC Registered memory was initially used, but ended up being swapped out for 12GB of Wintec Industries ECC Registered RAM due to incompatibility issues.
Taking a look at the board, right away we can see that the location of the 1394 FireWire pinouts is problematic as they get covered by whatever is placed in the secondary PCI-E 16x slot. On the bottom right corner of the board there’s an SAS controller under the green heatsink and ports to support up to eight SCSI drives. Supermicro actually makes an identical board, the X8DAi, that omits the SAS controller. Because of a discount, they just happened to both cost the same at the time of our hardware purchase and who are we to pass up SAS support?
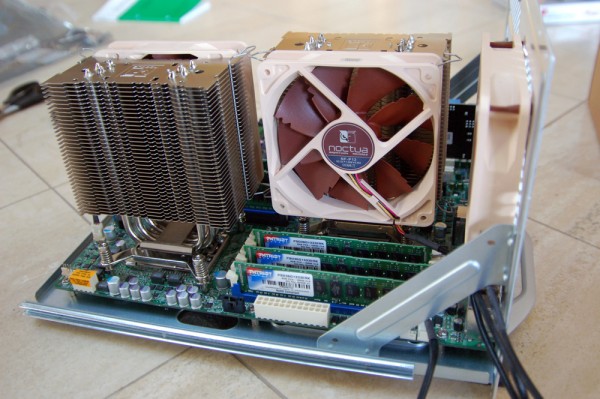
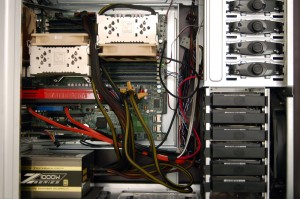
The Noctua NH-U12DX CPU heatsinks we’re using are server variants of the popular Noctua NH-U12P. They’re certainly overkill, but oh so quiet. To have access to the primary PCI-E 16x slot and the CPU1 8pin power slot, we’ve opted for an odd heatsink and fan placement where one fan pushes air through the heatsink and the other pulls air through, both bringing hot air towards the top of the case where it’s exhausted by the Cooler Master ATCS 840’s two massive 23cm fans. That brings up the topic of our choice of case.
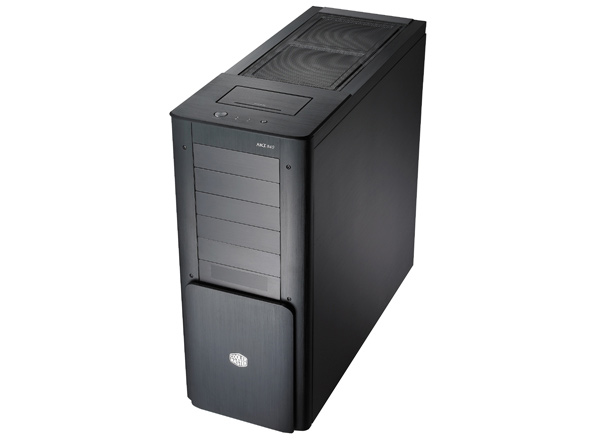
A full tower was the only option short of a rackmount that will fit an eATX board. There’s a substantial difference in size between a mid-tower ATX case and the ACTS 840 full tower. This thing could eat a mid-tower and still have room left over. It’s beautifully clean aluminum exterior does away with the plethora of plastic vents, lights and other cheap aesthetics that seems to plague cases these days. Additionally, the ATCS 840 has a removable tray which made life easier when installing the RAM, processors and heatsinks, not to mention the clip-on heatsink fans.
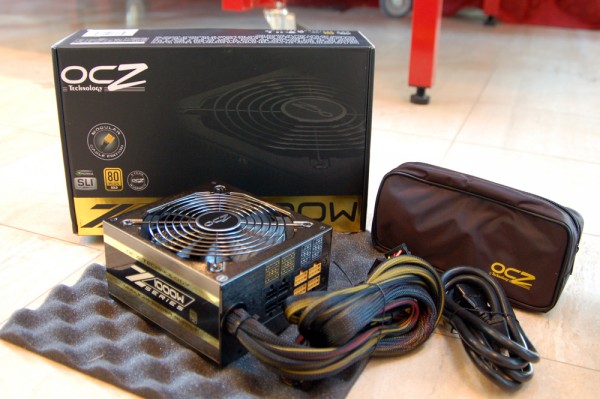
The OCZ Z Series Gold 1000W was chosen for its high efficiency and modular cabling. For a 1 kW PSU, it’s surprisingly small and light. Because The Colossus will also be used as a render rig, it may be at a heavy load 24 hours a day for weeks at a time, that means an efficient PSU is crucial. With an 80 Plus Gold rating, the OCZ ZSeries Gold 1000W has been reported to run at 87% efficiency at low and peak loads and barely surpass 90% during optimal loading conditions. The power savings alone easily justify the higher cost and the modular cable system helped keep the case clean and was easier to work with.
The ATI HD5870
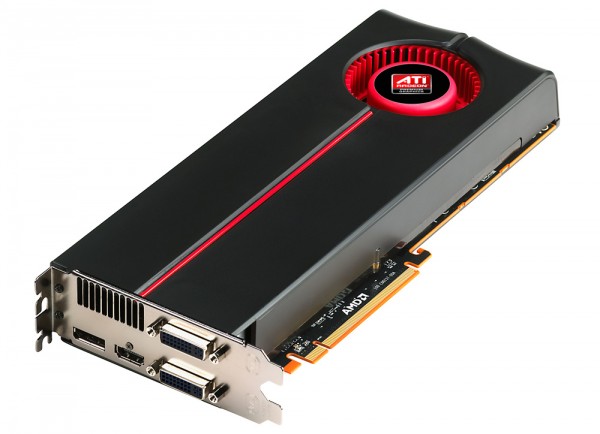
Certainly the most controversial piece of hardware in our rig is the video card, ATI’s new-to-market HD5870, the most powerful single GPU card available and is currently in short supply–which would explain why it’s retail price has raised from $379.99 to $429.99 since we bought it, making it the best hardware investment we ever made.
Remember that even though Project Colossus is all about building a high performance computer, as a workstation, it should be a stable work platform. Using a brand new piece of hardware (with brand new drivers) as critical as the video card is questionable, traditionally one would use a professional workstation card that’s designed specifically to work with simulation, modeling and rendering software. So, are we crazy or something? While The Colossus is a workstation, our goal was to build an all around power platform for both work and play. For the same price as the HD5870, we would have been able to afford something along the lines of a Quadro FX 1800, which should deliver gaming performance close to the midrange 9600GSO, another G94b GPU based card. All in all, a desktop card is a compromise, trading professional software performance for gaming performance. It’s still a new card with potentially unstable and/or incompatible drivers. We could have gone with a card in the HD4000 or GT200 series that would have had mature drivers. So, why the HD5870? Because we’re crazy.
Now that The Colossus put together, it’s time to test it and offer some juicy benchmark results. Stay tuned for Part 2, where we make your computer look puny.




While I admire the time and energy that goes into building your own “beast”, i’m glad after reading this that I don’t do that anymore. I can have a powerful system that can run almost everything at full speed for $799, and it comes ready to go out of the box (not taking into account driver updates of course).
Most users won’t have to spend more than $1000 retail to meet their needs, even less if they build it themselves. The Colossus was built with CPU rendering in mind, which scales to take full advantage of its eight cores. On the other hand, for a budget gaming computer I’d use a single overclocked dual or low-tier quad core processor since most games are poor at multithreading and would better benefit from a high clock speed.
Say there’s a game or application that doesn’t thread across more than one core, even in turbo mode @ ~2.5GHz, the eight cores of our workstation would process slower than a single core processor @ 3.0Ghz. Point being that one should buy/build their computer based on their needs. Just as our workstation is a poor solution for single threaded programs, an $800 desktop is a poor solution for CPU rendering.
Hi Josh,
This article is incredibly useful to me as I am about to build my own workstation for use in architecture school, as I use a lot of CAD and 3D design programs like AutoCad, Sketchup, 3DS Max, and Solidworks.
I hope you might be able to answer a few questions for me that pertain to my own set up.
First, why didn’t you use any SAS drives in your machine?
I have been planning on going with a Fuji 174GB 15K HDD for my main drive and a couple of 1 or 2TB drives in a RAID 1 config for storage of program files. Would this be effective in terms of speed and storage? Is there anything that I should know about SAS if I haven’t ever built a rig with it before?
Second, I understand why you got a desktop video card, but I was wondering if a workstation card at around the same budget as your desktop card would be worth it?
Lastly, is it more advantageous to use ECC registered memory or unbuffered memory for performance sake? And what is ECC memory?
I’m used to building gaming and low budget graphics machines and I’ve never built my own workstation before, so any other advice you could give me would be great!
Hey Ryan,
Right now, SCSI is definitely the go to tech when it comes to high speed enterprise data handling. It’s cheaper and arguably more reliable and than SLC-based SSDs and much faster than most IDE/SATA drives. The reason I didn’t use the SCSI drives in the build is that I don’t need data redundancy or overly high reliability for my main disk as much as speed. Although the MLC-based SSD we used (Intel x25-m G2) cost more than a comparable SCSI disk, it’s also significantly faster due to its phenomenal random read/write speeds that even SCSI can’t touch. If the drive does die, I’ll have downtime, but downtime for me isn’t as critical as say a data center, which would likely run SATA or SCSI drives in a RAID 5 array or something of that sort to avoid downtime at all costs. Anandtech.com has some amazing articles that cover SSDs that are worth a read if you’re considering getting one. Because it’s such a new tech, there are many brands/models that are severely flawed due to controller issues, etc. At the moment, the Intel x25-m G2 160GB and Indilinx/Sandforce based OCZ Vertex drives are the way to go for SSDs.
I think at workstation video card at the $800 price point would be better than a $350 consumer card. Given the issues I’ve had to work around with the HD 5870, I’d suggest getting an ATI HD 4000 series card or an Nvidia card (as they haven’t released a next gen card at this point) since they will have more mature drivers. Workstation cards and drivers are designed to work specifically with professional software and while you pay a significant premium, it’s your best bet for smooth running. Do I think they’re worth it for a student? No, I ~think~ you’ll get more bang for your buck in the $300 range with a consumer card, but I don’t have any data to support that.
Registered or “buffered” memory has tiny registers between the DRAM modules that buffer one clock between the memory bus and DRAM, because of this one clock delay, it’s actually lower performance than unregistered/unbuffered memory. I want to say these work in conjunction with ECC (error correcting code) as a cache for parity data, but I’ll have to do a bit more searching to give you a better answer on that.
I’ll expand on this later, I’m actually running out to catch a bus!
I’m still trying to dig up the specific processes behind ECC, but this article from Kingston should clear up some questions, http://www.kingston.com/tools/umg/umg05b.asp
I’m also going to retract my comment on the reliability of SLC SSDs. It’s new tech, the exact reliability is unknown, but according to the 10,000 read/write per bit until failure number quoted by Intel, SLC drives should be able to handle enterprise levels of data read/write for extended periods of 10 yrs+. Again, it’s worth reading some of the AnandTech.com SSD articles and visiting their forums. They’re certainly the leading resource for SSDs. With prices dropping, an SSD may be an obvious choice over a SCSI HDD for a workstation. I expect there to be news on upcoming SSD releases later this week at CES.
CES SSD news:
Toshiba: new 34nm SSD’s coming out up to 512gb
Kingston: Revamping V series with new drives going to 512gb and uses new Toshiba controller
Intel: Not much happening, but can expect new SSD’s late 2010 or early 2011.
Skattertech is working on acquiring the drives for review and comparison so stay tuned!
Ryan,
If you’re planning on going with SAS (which is normally controlled by a different controller than the standard SATA ports) make sure your motherboard supports multiple RAID arrays. Some boards will only let your RAID either the SAS drives or the SATA drives and not both leading to a PITA.
Also for your primary drive, if you’re using it as a boot drive mainly I’d definitely go with an SSD. For your 2tb RAID 1 array make sure you go with drives that are compatible. My case in point being, WD Caviar drives are a poor choice as the TLER (Time limited error recovery) setting can’t be altered on them making it easier for them to be dropped from your RAID array. While this won’t make you lose data instantly per say, the time it takes to rebuild your RAID array definitely isn’t something you want to be having occur. If absolute data storage is important for your RAID 1 definitely get enterprise grade drives which will have proper RAID 1 and 5 settings (TLER isn’t important for RAID 0 and will be fine with consumer drives).