
 When I first set out to build a gaming computer I had to sit down and ask myself a few questions. They were questions such as, “How much do I want to spend?” and, “What am I trying to achieve exactly?” These questions and a few simple others led me to the final question, “What’s dark, snake-like, powerful, and intimidating looking?” AHHHHH! RUN! IT’S GODZILLA… and Lord Voldemort. I decided that instead of building a monsterous and rampaging Godzilla of a computer that a tidy and composed, yet just as powerful “Lord Voldemort” of a computer would suit my style better. My Voldemort computer would need to be powerful, stealthy, and sleek while still having that element of intimidation to strike fear in to those who see it. I progressed with these goals in mind to take the next step of collecting the various horcruxes I would need in order to raise the Dark Lord (without actually killing anyone, of course).
| Horcruxes (parts): | Price |
| CPU: Intel Core i7 920 2.66GHz, D0 stepping, Batch 3927A476 | $218.49 |
| Heatsink: COGAGE TRUE Spirit | $40.51 |
| Thermalright 1366 bolt-through kit | $13.17 |
| Arctic Silver 5 | $7.05 |
| Motherboard: Asus P6T6 WS Revolution | $274.02 |
| RAM: Corsair XMS3 6GB (3 x 2GB) DDR3-1600 CMX6GX3M3A1600C9 | $121.44 |
| GPU: Sapphire ATI Radeon 5850 | $284.39 |
| HDD: Two Western Digital Caviar Black 750GB HDD’s in RAID 0 | $69.94 x2 |
| PSU: Corsair HX850 850Watt modular PSU | $106.01 |
| Case: Raidmax Smilodon Extreme | $75.76 |
| Fans: Scythe Gentle Typhoon 1850rpm | $18.64 |
| Scythe Gentle Typhoon 1450rpm x 3 | $16.45 x3 |
| Optical: Lite-On iHAS324 Dual Layer DVD-RW | $23.67 |
| Keyboard: Microsoft Comfort Curve 2000 | $13.98 |
| Mouse: Logitech G5 (version 2) | $39.90 |
| Monitor: NEC EA231wmi 23 inch, E-IPS Panel | $341.88 |
| Total: | $1,768.14 |
Who knew raising a powerful dark lord from the dead wouldn’t require me cutting off a hand after all? While not the most powerful and costly wizard on the block (see: Harry Potter), raising Voldemort didn’t require boatloads of money for great performance. All in all, the roughly $1800 spent on this system (including peripherals, shipping, and taxes) was a pretty good deal, especially when you consider that the components had an MSRP total of $2399.45 (not including shipping/taxes). So what makes this dark lord a great bang for the buck? Let’s fly through the details.
CPU: Intel Core i7 920 2.66GHz
 The Core i7 line of CPUs is the first line of chips by Intel to have an integrated memory controller. This new memory controller dramatically decreases latency times by connecting the CPU directly with the memory without having to go through a northbridge first. Core i7 also offers triple channel memory capabilities, which increases memory bandwidth over the more common dual channel standard. Four physical cores and four virtual cores, from Hyper-Threading, give the Core i7 immense computing power. Intel currently has two variants of the i7 line of CPUs, one for socket 1156 and the other for the superior socket 1366. The i7 920 is the lowest rated processor you can get for socket 1366. And why would such a powerful Dark Lord go for the lowest CPU in its class? Because the i7 920, while the lowest 1366 CPU available, offers incredible value in its common ability to overclock to more expensive i7 speeds. Pair it with a good heatsink and even after the extra cost you’re still paying less than a more expensive model while getting the same, if not better performance.
Heatsink:
- COGAGE TRUE Spirit
- Thermalright 1366 bolt-through kit
- 1850rpm Scythe Gentle Typhoon
- Arctic Silver 5
To ensure that the Dark Lord stayed cool while lingering in the shadows I enlisted the help of the COGAGE TRUE Spirit CPU heatsink. If you’re thinking that the TRUE Spirit looks an awful lot like the Thermalright Ultra Extreme (TRUE), you’ll be comforted to know that the TRUE Spirit is the TRUE’s little brother. Compared to the TRUE, the TRUE Spirit features two less heatpipes (for a total of four), a smaller size, and most importantly, a significantly cheaper price. Performance wise, the TRUE Spirit has just slightly less cooling ability. Included with the TRUE Spirit is a 120mm PWM (pulse width modulated) fan that’s rated to move from 35-66.5CFM of air at 19.6-37.4dBA.


The Thermalright 1366 bolt-through kit offers a more stable and secure mounting solution for Thermalright and COGAGE TRUE based coolers. It helps apply more pressure ensuring better contact and heat conductivity between the CPU and heatsink. As the TRUE Spirit is far from a small cooler, the bolt-through kit offers one a good peace of mind.
 The name Gentle Typhoon actually describes Scythe’s latest line of fans quite well. Despite the irony (who’s ever heard of a “gentle” typhoon?), these fans put out a strong amount of airflow at a quiet noise level. Utilizing a dual ball bearing design, the Gentle Typhoon fan series has a long lifespan as well as the ability to be mounted horizontally, which can quickly kill conventional sleeve bearing fans. High pitched fan blades give the Gentle Typhoons good static pressure, which is essential to keep the air flowing through obstructions such as tightly packed heatsink fins or filters. Some innovative features of the Gentle Typhoon fans are the ring of weights around the motor as well as small notches at the base of each propeller. The ring of weights reduces vibration and noise, while the notches create a different sound pitch that’s less noticable and thus less annoying. While these fans aren’t cheap, they live up to their name by moving lots of air at very quiet levels. I’ve chosen the 1850rpm model for my heatsink, which is rated to move 58CFM at only 28dBA.

When it comes to high performance thermal interface materials none has had as long a reputation as Arctic Silver. Now in its 5th iteration, Arctic Silver 5 effectively uses silver atoms in its paste to better transfer heat from the CPU to heatsink. Why do you need this paste between your CPU and heatsink? Unfortunately CPU heat spreaders and heatsink bases aren’t 100% flat or smooth due to machining processes. Thus a thermal paste is needed to fill the microscopic ridges and valleys for better surface contact and heat transfer.

Motherboard: Asus P6T6 WS Revolution
Asus has been a longtime high quality manufacturer of motherboards and one of the worldls largest computer hardware OEMs. Known for their innovative designs and features, reliability, and performance Asus was very appealing for me. I chose their “WS” workstation grade P6T6 WS Revolution motherboard. While the P6T6 is pegged as a workstation board, it offers incredible enthusiast performance as well. High performance and robust overclocking abilities make for a great combination. The P6T6 utilizes an advanced phase voltage regulation design offering 16 clean and stable power phases for your CPU cores and an additional two phases for the uncore (QPI, memory controller). This is important for high overclocks. Another prominent feature is the six PCI-E 2.0 16x slots, which let you run up to three video cards in full 16x mode. PCI-E 16x slots will also accept PCI-E 8x, 4x, 2x, and 1x cards. One thing the P6T6 does not have is legacy support (no IDE, only one PS/2 slot). Other features include six SATA ports, two Marvell controlled SAS (which will also accept SATA) ports, integrated 8-channel high-definition audio, an external SATA (eSATA), crash free bios, helpful quick diagnosis card, and a host of other innovative features.


RAM: Corsair XMS3 6GB (3 x 2GB) DDR3-1600 CMX6GX3M3A1600C9
Ask any computer enthusiast what a great performing, stable, and reliable brand of RAM is and Corsair is sure to be one of the answers. I picked up a 6GB (3 x 2GB sticks) kit of 1600MHz Corsair XMS3 RAM in order to utilize the i7’s triple channel capability. Corsair’s XMS line has always been a high performance product. With timings at 9-9-9-24, this particular kit wasn’t the absolute fastest, since lower is better, but then again Corsair tends to rate their products conservatively. So why did I get a 1600MHz kit when the i7 920 only runs RAM at 1066MHz? The answer is expandability. When overclocking a CPU you also alter the RAM speeds. Running higher RAM speeds results in higher performance.
Graphics Card: Sapphire Radeon HD5850
 ATI left their competitors in the dust when they unleashed the HD5800 series of graphics cards. It’s impressive that the HD5800 cards have lower idle power requirements, and similar load power requirements compared to the previous HD4800 series of graphics cards, which had about half the transistors of the new HD5800s. These new cards are the performance kings being the first DirectX 11 (DX11) capable GPU’s to the market. The only drawback are the cards’ huge sizes as my HD5850 comes in a a whopping 10.5 in. Another smaller drawback is the poor yields, which pushes the prices of these cards at MSRP or higher. Even though Voldemort’s HD5850 is out-wanded by the $379 HD5870 and $599 HD5970, it’s more than powerful enough to run any game at full settings at a 1920×1080 resolution. Spending the additional money for the more powerful graphics cards wouldn’t have given me any tangible benefits. The HD5850 features 1GB of GDDR5 memory on a 256-bit ring bus which can travel in either direction, allowing for full AA and AF effects. Overclocking the HD5850 to HD5870 levels of performance shouldn’t be very difficult as this card is a HD5870 with some stream processors disabled and a slightly lower clock speed.
Hard Drive Disks: Western Digital Caviar Black 750GB
 The Dark Lord called upon Western Digital’s Caviar Black line in order to remember all the people to exact revenge on. The Caviar Blacks outperform virtually of their competition with their low access times and high read/write speeds. Bundled with the Caviar Blacks is a comforting five-year warranty. I decided on the 750GB models for a RAID 0 configuration because Newegg.com had an amazing deal at the time of purchase. RAID 0 is when your computer treats both drives as one large drive (750GB x 2 = 1.5TB drive). Half the data is processed from each drive when the computer is in this configuration allowing for almost double read/write speeds. Caviar Blacks should not be used for data redundancy RAID modes such as RAID 1 or RAID 5 as their time-limited, error- recovery (TLER) cannot be adjusted. This results in less stability in those RAID modes compared to enterprise-grade drives.
Power Supply: Corsair HX 850
 Like it’s memory, Corsair has made a big name for itself in the power supply arena since its entry in 2006. Over the past year Corsair power suppliess have been getting rave reviews for their price, performance, and ease of use. I purchased the HX850 modular model, which achieves 80-Plus Silver levels of power efficiency. Even though many HX850 units achieve 80-Plus Gold levels, and are rated Gold level by the 80-Plus organization, Corsair decided to be conservative and only advertises 80-Plus Silver. Included with the HX850 is a velvet bag for the unit itself, as well as a plethora of quality modular cables in their own hook and loop storage bag. The modular interface of the HX850 means you can attach just the cables you need, allowing for a cleaning looking interior. Essential wires are hardwired to the unit for maximum performance. Cooling this high-powered unit is a large 140mm fan. Pricewise, the HX850 is a hard product to beat.


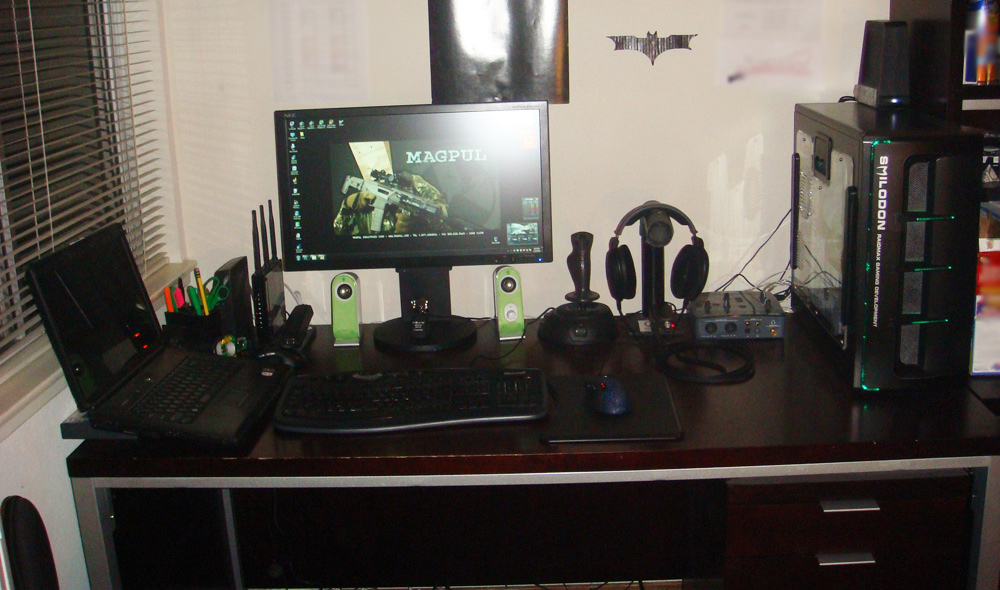
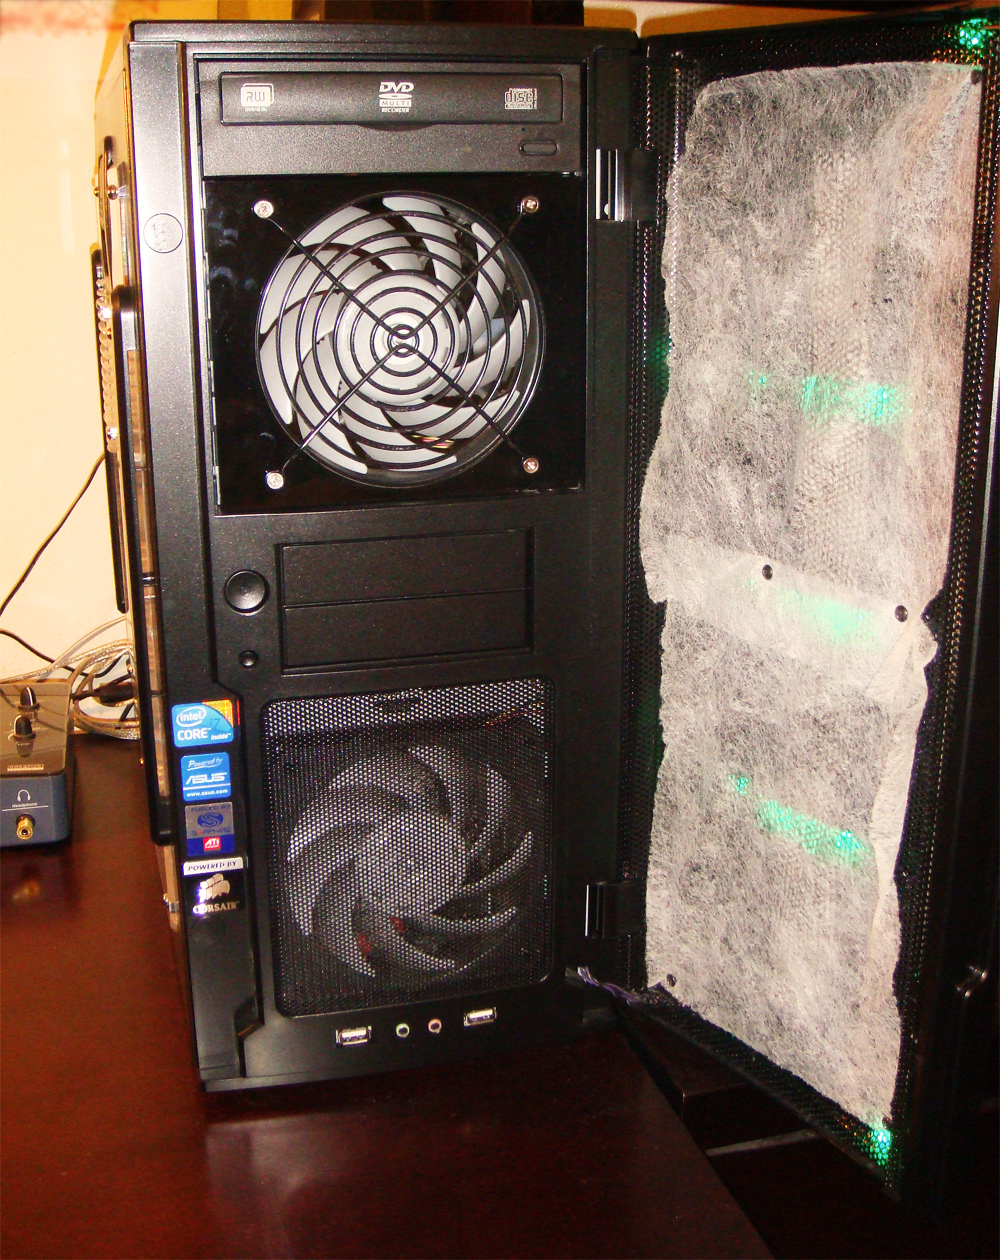
Case: Raidmax Smilodon Extreme
Dark and intimidating looking, the Raidmax Smilodon Extreme had all the features the Dark Lord was looking for in a body. The matte black exterior with eerie green LED’s provided just the aesthetic atmosphere I was looking for. The Smilodon Extreme features a full front door that opens to the right. Behind this are four 5.25 inch bays, two 3.5 inch bays and a 120mm fan. For my build I stuck my optical drive in the top 5.25 inch bay and installed a Mountain Mods 120mm fan holder in the remaining three 5.25 inch bays. The center of the door contains a metal mesh running vertically allowing airflow to the fans. The side doors fold out with the pull of a latch near the top of each door. Additionally, the door with the motherboard features a removable motherboard tray. However, users beware: should you install a heatsink too tall to clear your power supply, folding out the motherboard side door will not be an option. All drive bays utilize a tool-less mounting method for quick installation and removal of devices. Additionally the hard drive cage is also removable. I had to make some modifications for my Smilodon Extreme, which will be explained further in the modifications section. I chose not to include the crossbar “dirk tooth” piece because it wouldn’t fit with my hardware, and because it was an obstruction to the case window. Luckily this piece is easily removed.
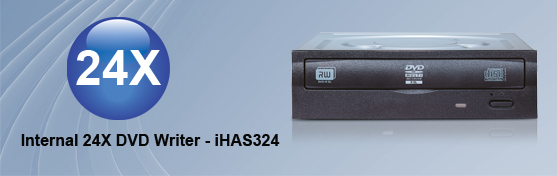
Optical Drive: Lite-On iHAS-324 Dual-Layer DVD-RW Drive
The Lite-On iHAS324 is a versatile DVD-RW drive with many capabilities. It can read/write all the latest formats except for Blu-ray. Lite-On has always provided quality drives at a good price giving the buyer great value. The iHAS324 uses SATA connection and power adapters for faster data transfer and less cable clutter.
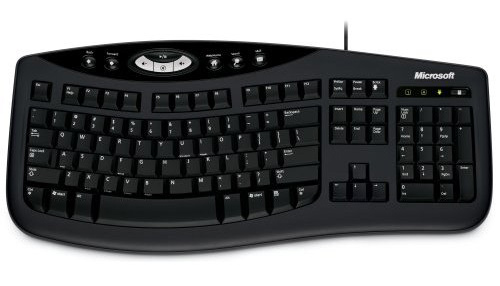
Keyboard: Microsoft Comfort Curve 2000
Microsoft’s Comfort Curve 2000 keyboard combined all the features I wanted for my keyboard. I desired for an ergonomic design as well as media and functionality keys. The Comfort Curve 2000 places your hands at a more natural angle. I liked the seamlessness of the main keypad as opposed to the break in the MS Ergonomic Keyboard 4000. The Comfort Curve 2000 includes media and web buttons up top as well as an extremely handy calculator button to the right above the keypad. While the key’s aren’t the quietest, they aren’t obnoxiously loud either. This keyboard connects via USB connection.
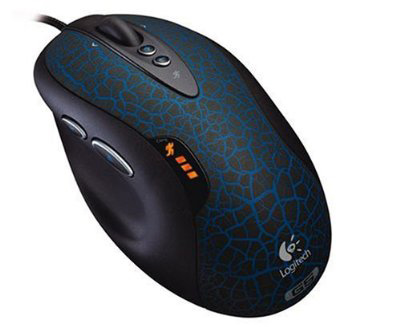
Mouse: Logitech G5 rev.2
Even though the Logitech G5 has been discontinued and replaced by the G500, it is still an outstanding mouse. With a plethora of buttons such as very handy forward and back buttons, to a side tilt scroll wheel, the G5 offers quick access to many controls. Underneath the G5 is an adjustable weight cartridge allowing users to adjust the feel of the mouse to their liking. The surface is a rubbery matte coating that offers very tactile grip. Three user-adjustable DPI settings are available via the + and – buttons on the mouse for gaming. The USB cable is covered in braided nylon offering great protection.
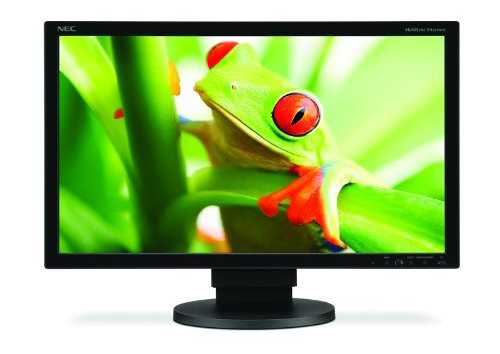
Monitor: NEC EA231WMi
The NEC EA231WMi is the latest 23 inch monitor coming out of NEC Display Solutions. Featuring a 23 inch LG e-IPS panel, the EA231WMi offers superior color as well as much greater viewing angles than standard TN panel monitors. The convenient stand rotates, adjusts for height, and even has an integrated cable management system for a professional and clean look. Connections include DVI, HDMI, and DisplayPort, as well as audio-in for the integrated speakers. On the left side of the screen are two USB ports for extra connectivity. The entire screen will also rotate 90 degrees for a portrait mode picture. Nifty features include a power saving eco-mode as well as a light sensor that auto adjusts the brightness of the screen to match your environment. Controls are easy to use thanks to a small joystick, and the on-screen display menu is very functional and natural to navigate. I noticed no ghosting while playing games and input lag seemed minimal. This monitor runs at a native resolution of 1920 x 1080 so you can experience all your media in full HD. Standard color profiles are easy to select and tests on various publications have shown that the EA231WMi out of the box has a very accurate color in the sRGB mode. At only about $339, this monitor is unrivaled in its features and performance.
Modifications and Tweaks:
While all the components of Project Voldemort were great individually, getting them all to work in conjunction with each other and helping them to meet my quiet and clean-looking requirements did warrant some modifications.
Working with the Case:
The Raidmax Smilodon case was certainly a pleasure to work with. Tool-less drive bays, fold out sides, and a removable hard drive cage all came in very handy. In order to maximize this case’s functionality some mods had to be done. As I couldn’t let Voldemort be “buried” again I had to make sure this case inhaled as little dust as possible. To achieve this, I followed SilverStone’s line of thought in their cases and implemented the use of positive pressure. Positive pressure occurs when your intake fans intake more air than what your exhaust fans exhaust. I had orginally planned on using the Smilodon’s side 80mm fan mounted on the Dirk-Tooth, but I hated how the Dirk-Tooth obstructed most of the interior and graphics card through the window. To remedy this I dremeled out the middle portion of the Dirk-Tooth. After completing this, however, I discovered that my COGAGE TRUE Spirit cooler was too wide, and obstructed the fan mount on the Dirk-Tooth. In the end I just went without the Dirk-Tooth.
The next mod to achieve positive pressure was to seal up the case’s openings. The side 80mm vent over the CPU cooler was sealed using a Mountain Mods 80mm acrylic cover and the lower Dirk-Tooth vents were covered with clear packing tape. On the motherboard side a piece of flat black paper and tape sealed the 80mm fan opening.

In the front of the case I mentioned how I installed an extra 120mm fan in a Mountain Mods triple 5.25 inch mount. Due to the tool-less design of the Smilodon, the unique mounting system wasn’t compatible with the triple 5.25 inch mount’s conventional screw holes. Also, supports for the drives on the chassis protruded into the mount. Once again the handy Dremel came forth and I made new holes and threaded them so I could mount the fan mount to the chassis. I also used the Dremel to remove sections of the mount that interfered with the chassis’ protrusions.
In order to maximize airflow and reduce noise, all unnecessary airflow obstructions had to be removed. The steel grid behind the front fan was dremeled out as well as the rear honeycomb, which was replaced by a much less restrictive 120mm fan grille.

I required dust filters to prevent dust from entering the case and burying the Dark Lord alive. After thinking about how I could mount conventional filters on both intake fans, and not liking the possibilities, a new unconventional method came to mind. Remember that perforated metal grille on the door? I looked on the inside of the door and delightfully found that it was mounted by simple machine screws. I also noticed that my used dryer sheets would work very well as a filter material. Utilizing six screws on the inside of the door I mounted two used dryer sheets to the inside, which would act as my filter material. This process is easy and affordable, since I will have fresh filter material every time I do my laundry.
Hard Drives:
Hard drives rotate at high speeds and thus create noise via vibration. In order to ensure the low noise output of this computer I needed to find a way to dampen the hard drives. The standard mounts that came with the Smilodon didn’t work well in my Western Digital Caviar Black drives and didn’t mount them effectively. The standard way of mounting the drives also caused them to protrude into the case giving it a messy look. To conquer both of these challenges I thought of a couple unconventional ways to mount them. The first way was to mount the drives backwards. By mounting the drives “cords in” no wires would be left sticking out into the case giving a much cleaner look overall. It also allowed me to move the drives into the hard drive cage more giving them a lower profile.
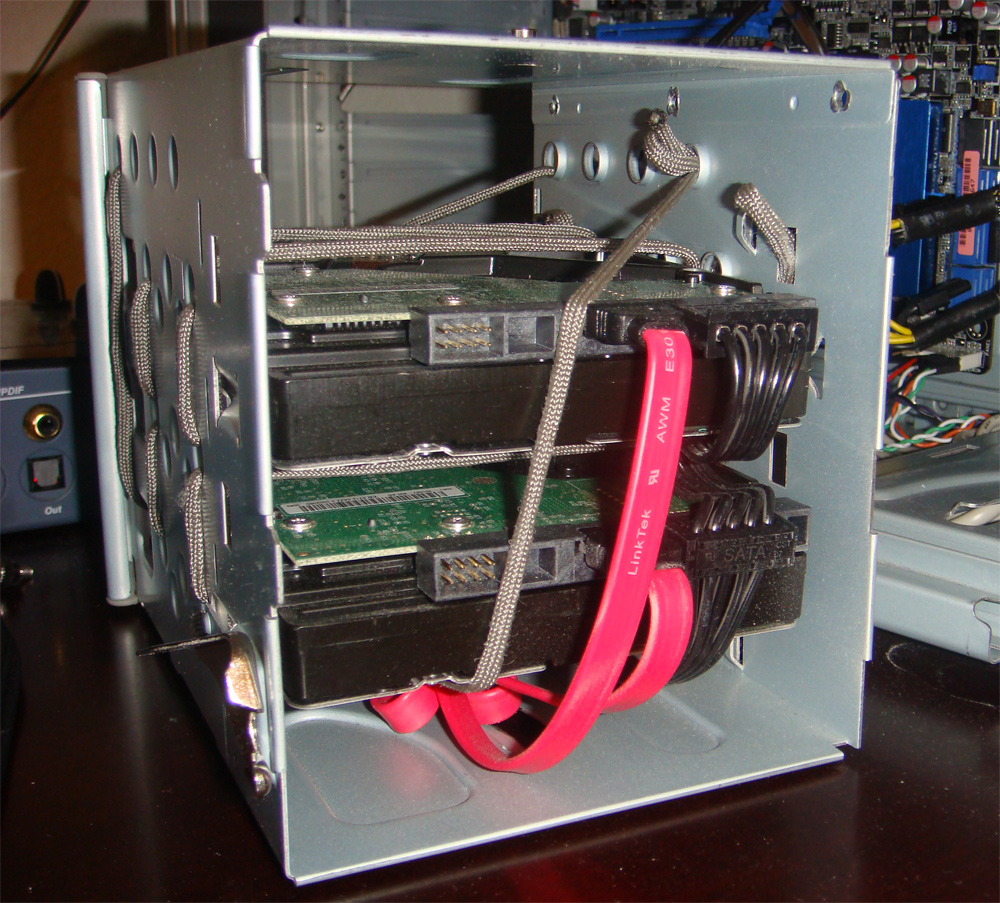
The second unconventional way of mounting the drives was to suspend them in an elastic material to reduce the drives’ vibrations and noise. I recalled the innovative P150 chassis, by Antec, and how it allowed users to mount their hard drives in rubber bands. While I didn’t have any elastic lying around, I did have 100 feet of paracord (also called 550 cord). Paracord is a thin shoelace-like material that can withstand 550 pounds of load. Seeing as how it was thin, way overbuilt, and easy to work with I used it as my ideal material. I devised a criss-cross pattern so that the drives would be secure from shifting into the sides of the hard drive cage. I also blocked off the front and back to prevent the drives from sliding out. When completed the hard drive suspension worked marvelously.


Fans:
Fans all create vibrations and can really make a lot of noise. I used tiny o-rings I had lying around to dampen the vibrations coming from my fans. Sticking these o-rings between the fan and the chassis gave me a medium with which to absorb lots of vibrations and thus reduce sound. I didn’t just stop with case fans however, and ended up using o-rings between my power supply and case as well in order to dampen vibrations there too. Unfortunately, I wasn’t able to fit o-rings between my 120mm fan and the Mountain Mods triple 5.25 inch fan mount; I was, however, able to stick o-rings between the fan mount and the chassis, therefore solving that problem. This modification was very convenient since o-rings are plentiful and cheap.
Conclusion:
Building Project: Voldemort had its ups and downs, but overall it was an educational and good experience. The performance coming from this machine is impressive, and has taken everything I’ve thrown at it with ease. Passing multiple days of intensive stress testing proved the components’ durabilities where cheaper options would have failed. If you’re looking for a similar computer, there are other parts options which will perform similarly to the ones I selected. While some of my components may be considered overkill, they add to the overall durability and longevity of the system. Should your budget not be quite as high as Project: Voldemort’s, I highly suggest looking into the Intel P55 chipset (1156 socket) and a Core i5 processor. That will significantly reduce costs. If you’re looking for even greater performance, acquiring a solid state drive (SSD) and moving up to a more powerful video card are a few options.